Visual Effect Project Video 2.2 Editing,
The video i have put together Successfully:
Behind the scenes:
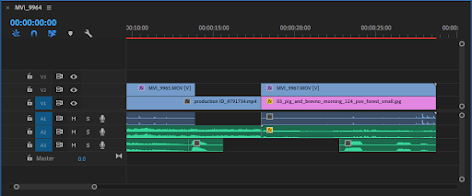
Here are some screenshots with each one explaining what happens at the time.
The first one shown is what happened just after i filmed during pre-production, the media is imported and is now accessible in Premiere Pro 2019, you can also import other pieces of media from the internet and merge them with yours to make a green screen effect. (Some images that i do not own will may subject to Copyright) You can also import audio from Youtube to MP3 Converter.
Originally i was meant to use some still images for my background but i have discovered the Pexels video downloader, thanks to this website i have downloaded live background videos to add for my green screen effects and it really makes the scenery come to life (it looks realistic) here is the link to the website. https://www.pexels.com/videos/

The screenshots are examples of what i have done during video editing and after some rinsing and repeating with the sound effects and footage i have used the ultra Key option to create the green screen effect before the final version of the video is created.
Overall after all of these edits the final video is then uploaded and now can be viewed on youtube.


Comments
Post a Comment